# android-code-template
**Repository Path**: duraemon/android-code-template
## Basic Information
- **Project Name**: android-code-template
- **Description**: 代码模版,生成一套样例代码,提示开发效率
- **Primary Language**: Kotlin
- **License**: Not specified
- **Default Branch**: main
- **Homepage**: None
- **GVP Project**: No
## Statistics
- **Stars**: 0
- **Forks**: 0
- **Created**: 2025-03-12
- **Last Updated**: 2025-03-12
## Categories & Tags
**Categories**: Uncategorized
**Tags**: None
## README
# Android Studio 代码模板插件
## 背景
>可以跳过背景和简述,从模板插件实现开始看.
开发新页面时,原先需要写一堆模板代码。比如用Databinding写列表结构的页面,需要手写以下文件:
* `XxActivity.kt`
* `XxFragment.kt`
* `XxViewModel.kt`
* `XxListAdapter.kt`
* `XxListItemModel.kt(UI数据结构)`
* `XxBean.kt(接口数据结构)`
* `XxBeanModelConvert.kt`
* `XxRetrofitApi.kt`
* `XxRetrofitRepository.kt`
* `yymoudle_xx_layout_activity.xml`
* `yymoudle_xx_layout_fragment.xml`
* `yymoudle_xx_layout_list_item.xml(列表item)`
并且类文件间还有相互的引用关系。
>如果能有一套代码模板,可以一键生成最小单元功能代码,确实能提高新开发页面的效率。(加快1~2个小时不为过吧?)
## 简述
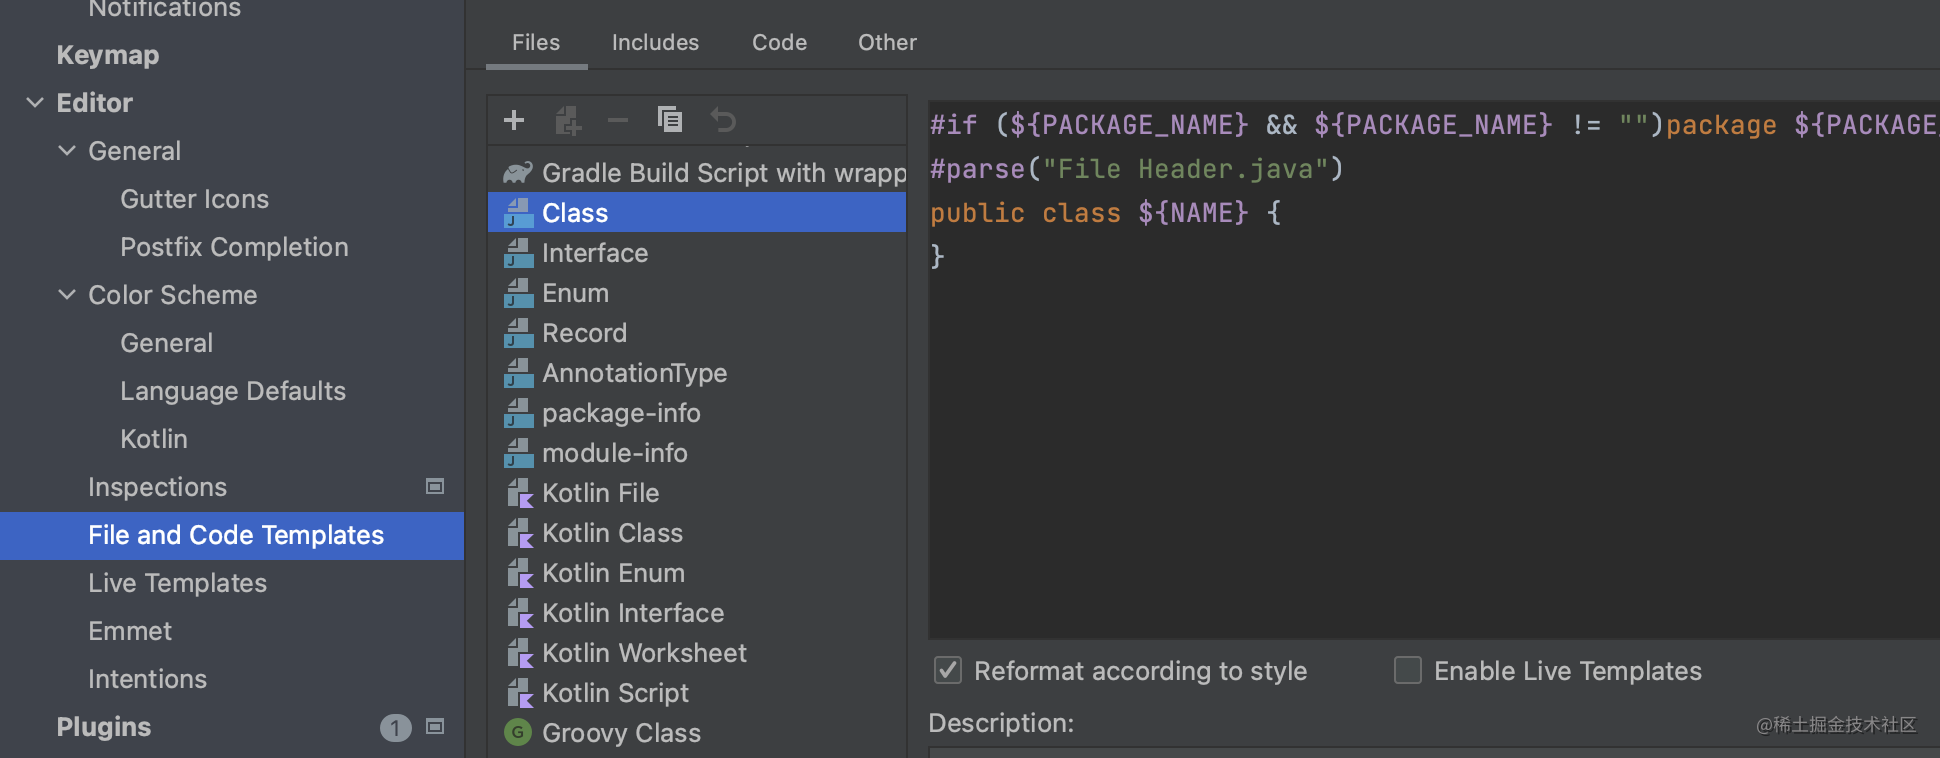
### Android Studio Editor
Android Studio 自带了两种代码模板(入口为Settings -> Edit):
* `File and Code Templates` : 倾向生成单个文件
* `Live Templates` :在单个文件中快捷生成代码,例如logd生成`Log.d(TAG, String)`
File and Code Templates 和Live Templates
### Android Studio Plugin
于是把目光投向了代码模板插件,搜索`template`,可以看到很多,比如这个`Jetpack Compose UI Architecture Plugin`。
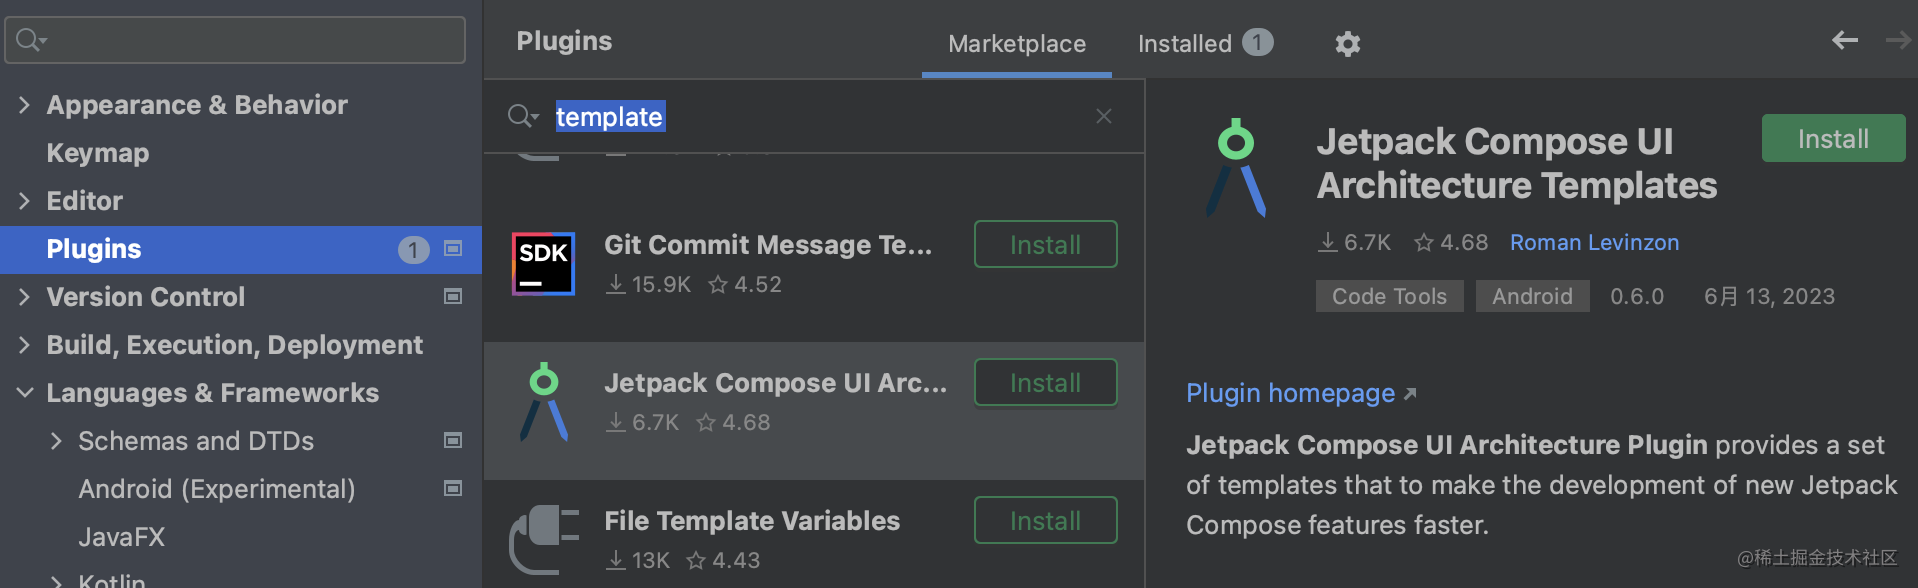
如何我实现自己的代码模板插件?
## 模板插件实现
Android Studio 是基于 IntelliJ IDEA开发的,Android Studio可以使用IntelliJ上丰富的插件。
IntelliJ提供了一个用于创建模板代码插件的模板项目,基于这个模板项目改造 。
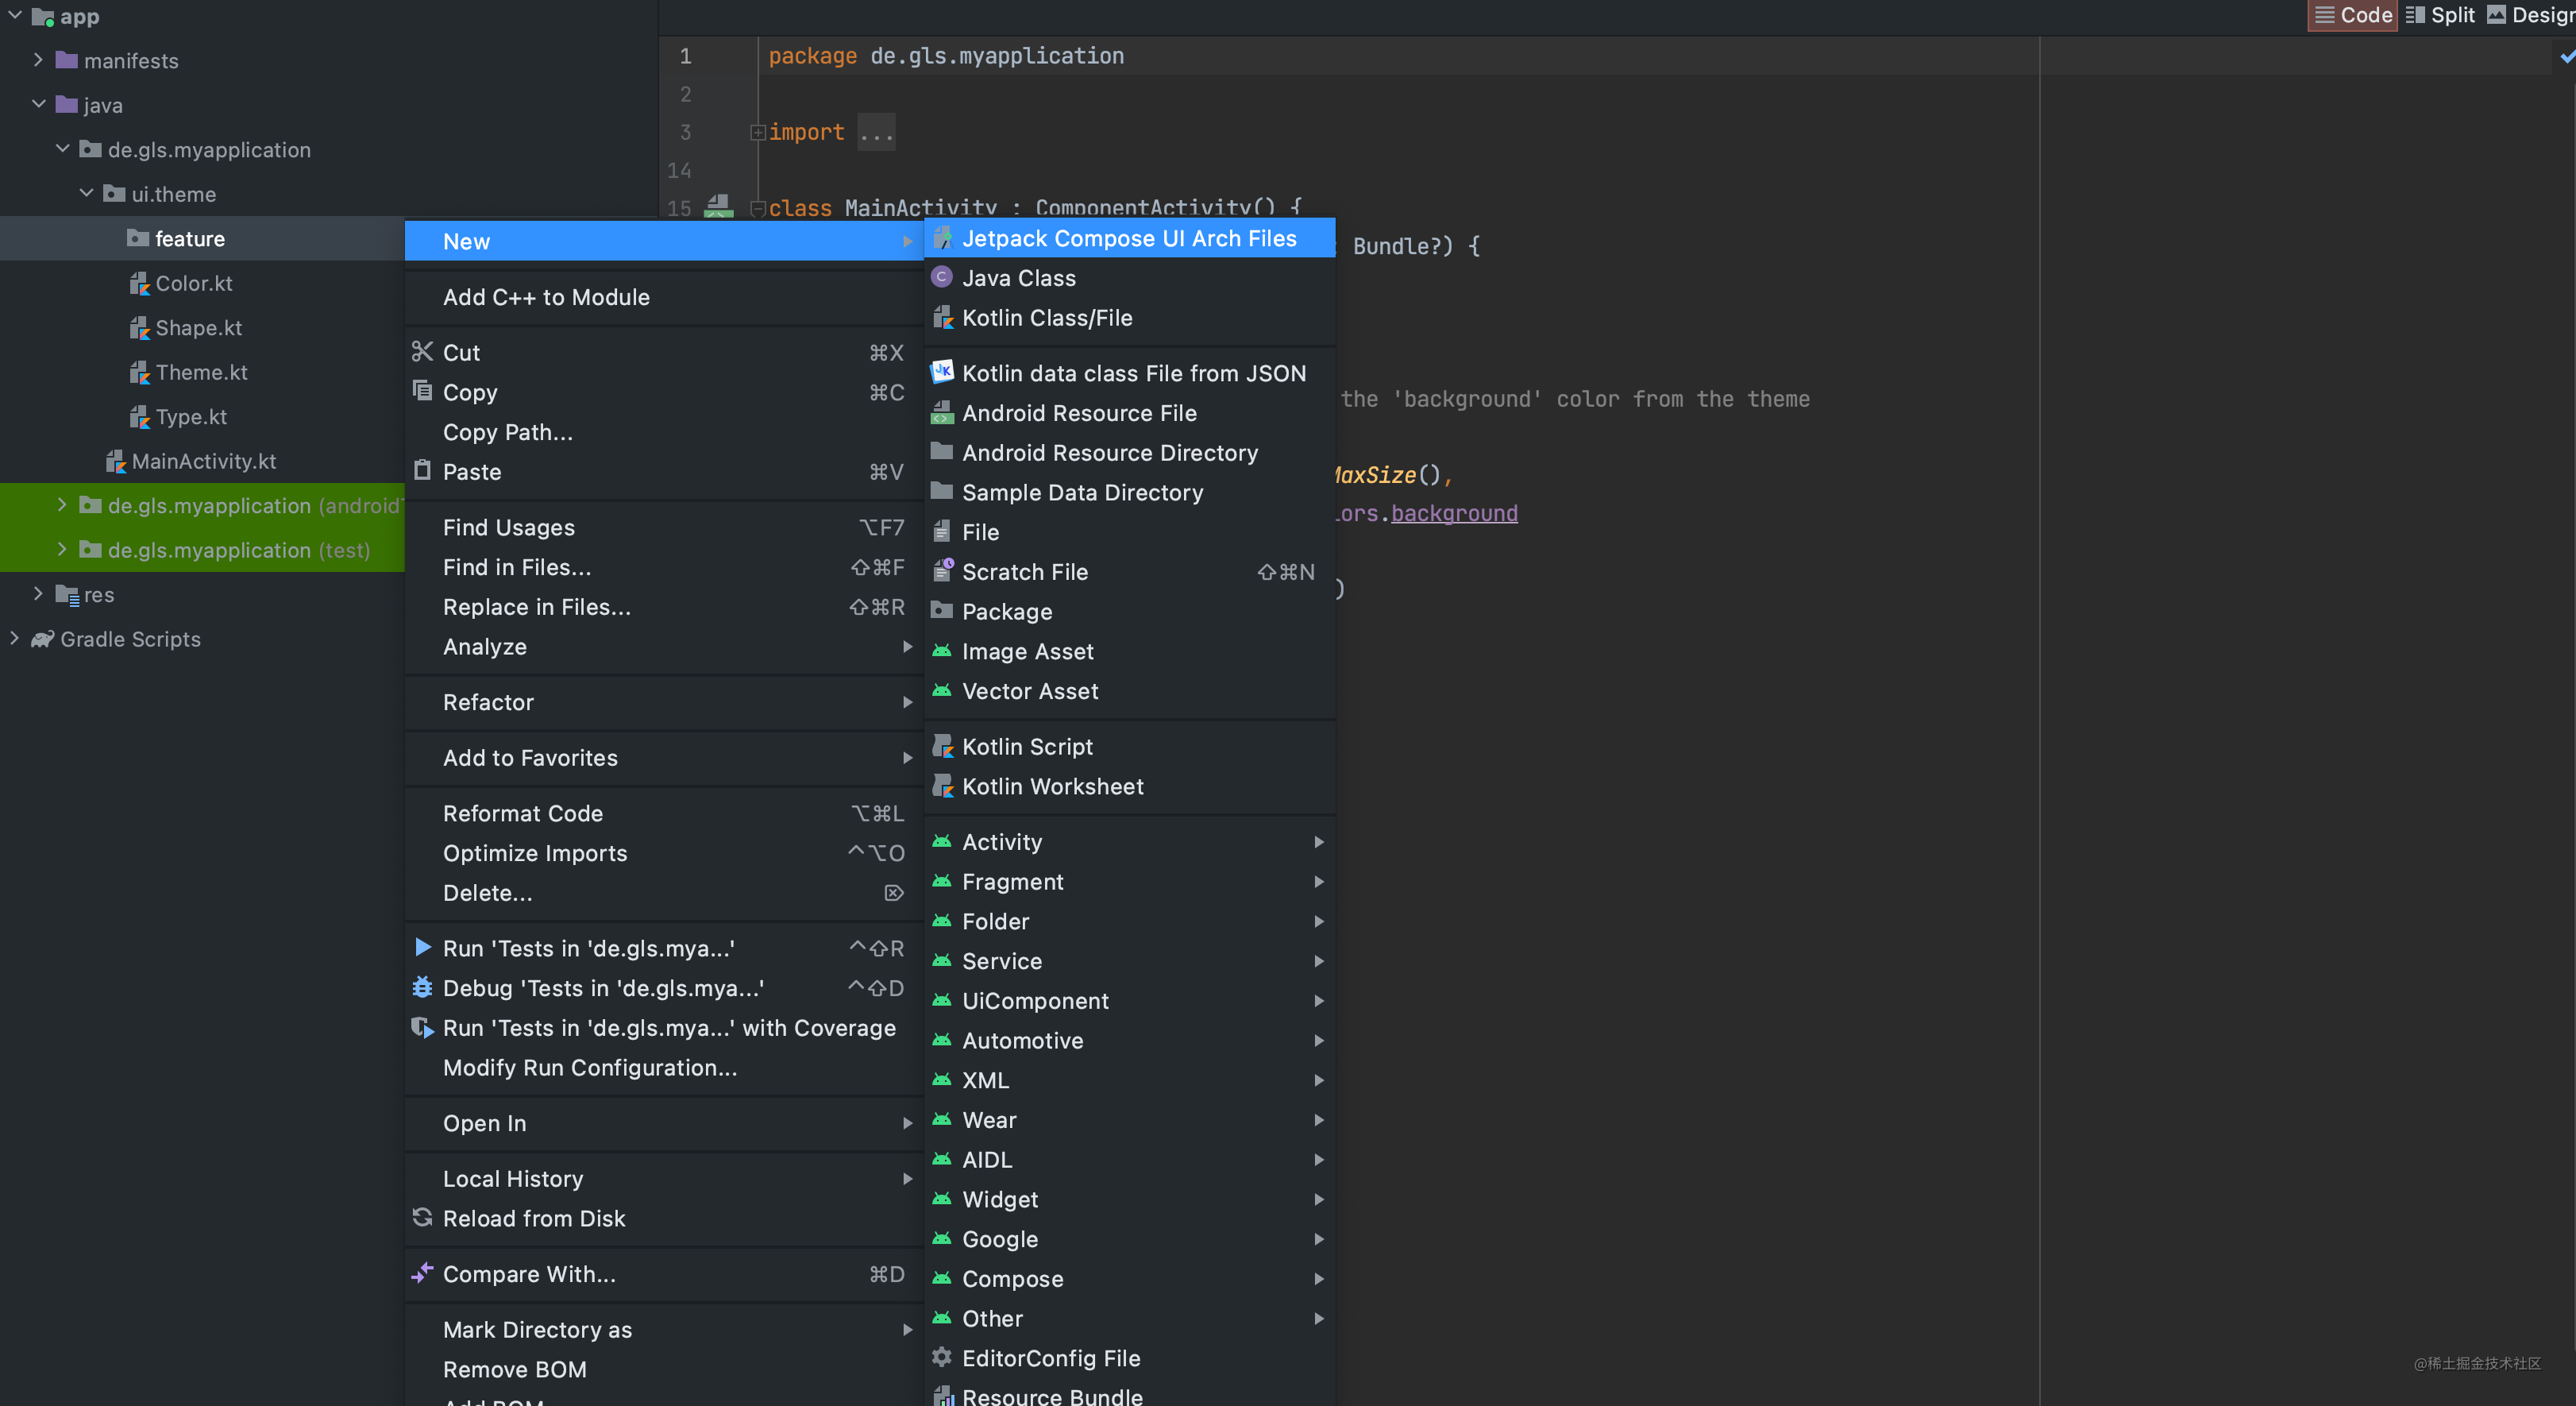
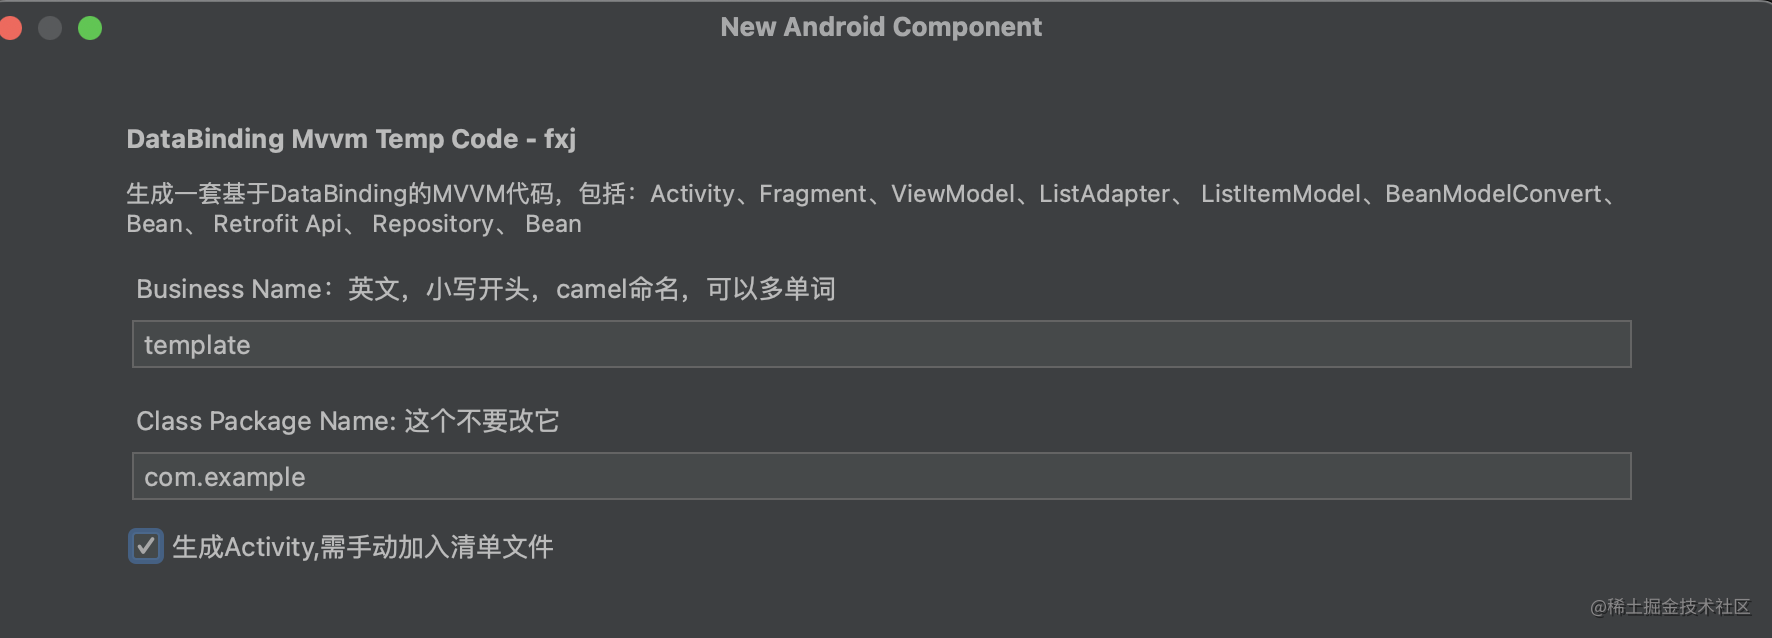
### 最终效果
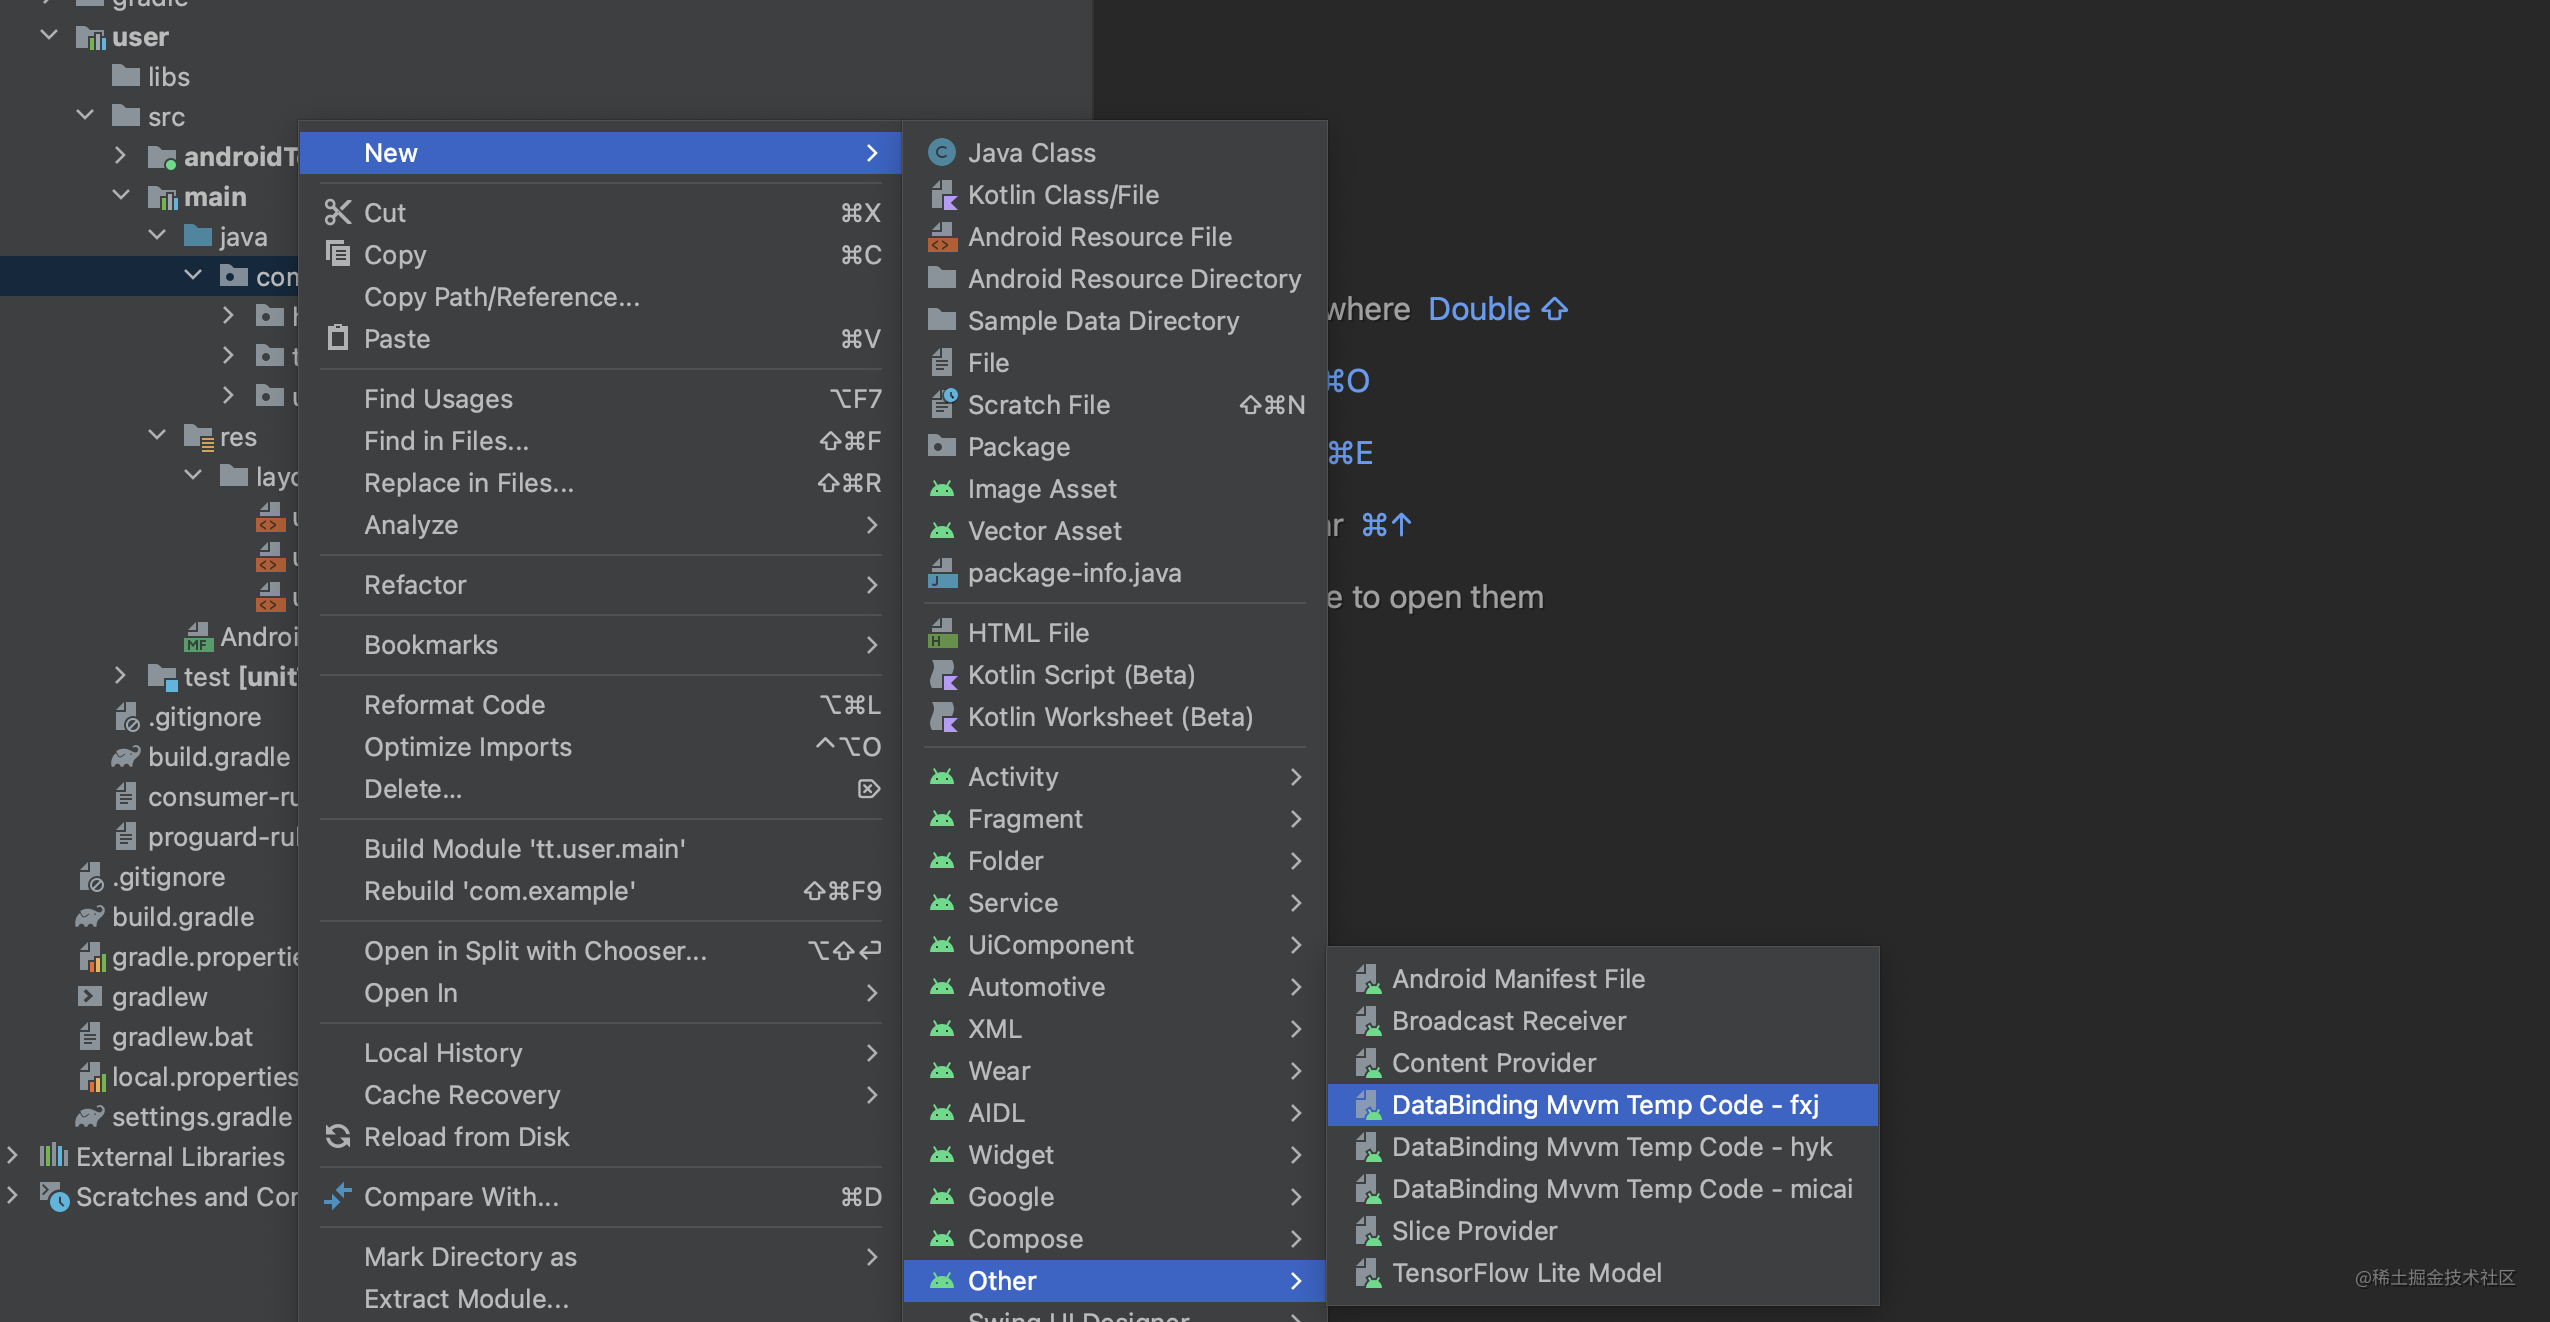
> 选择模板 -> 模板配置 -> 生成代码
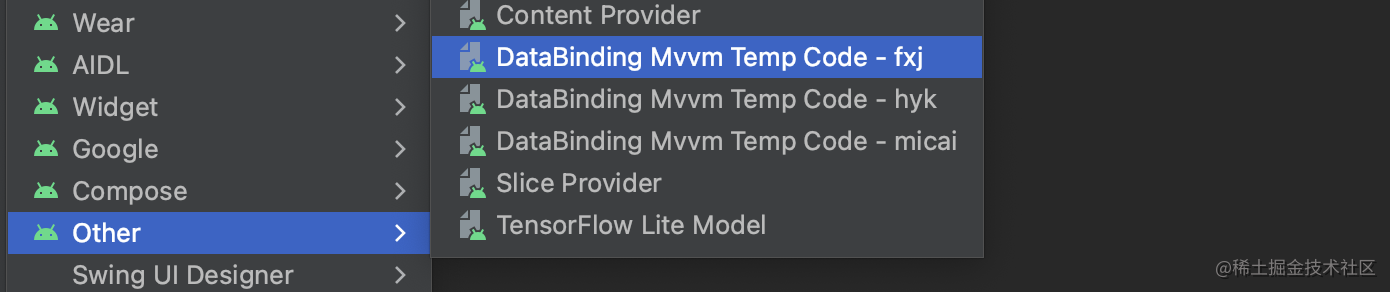
选择模板
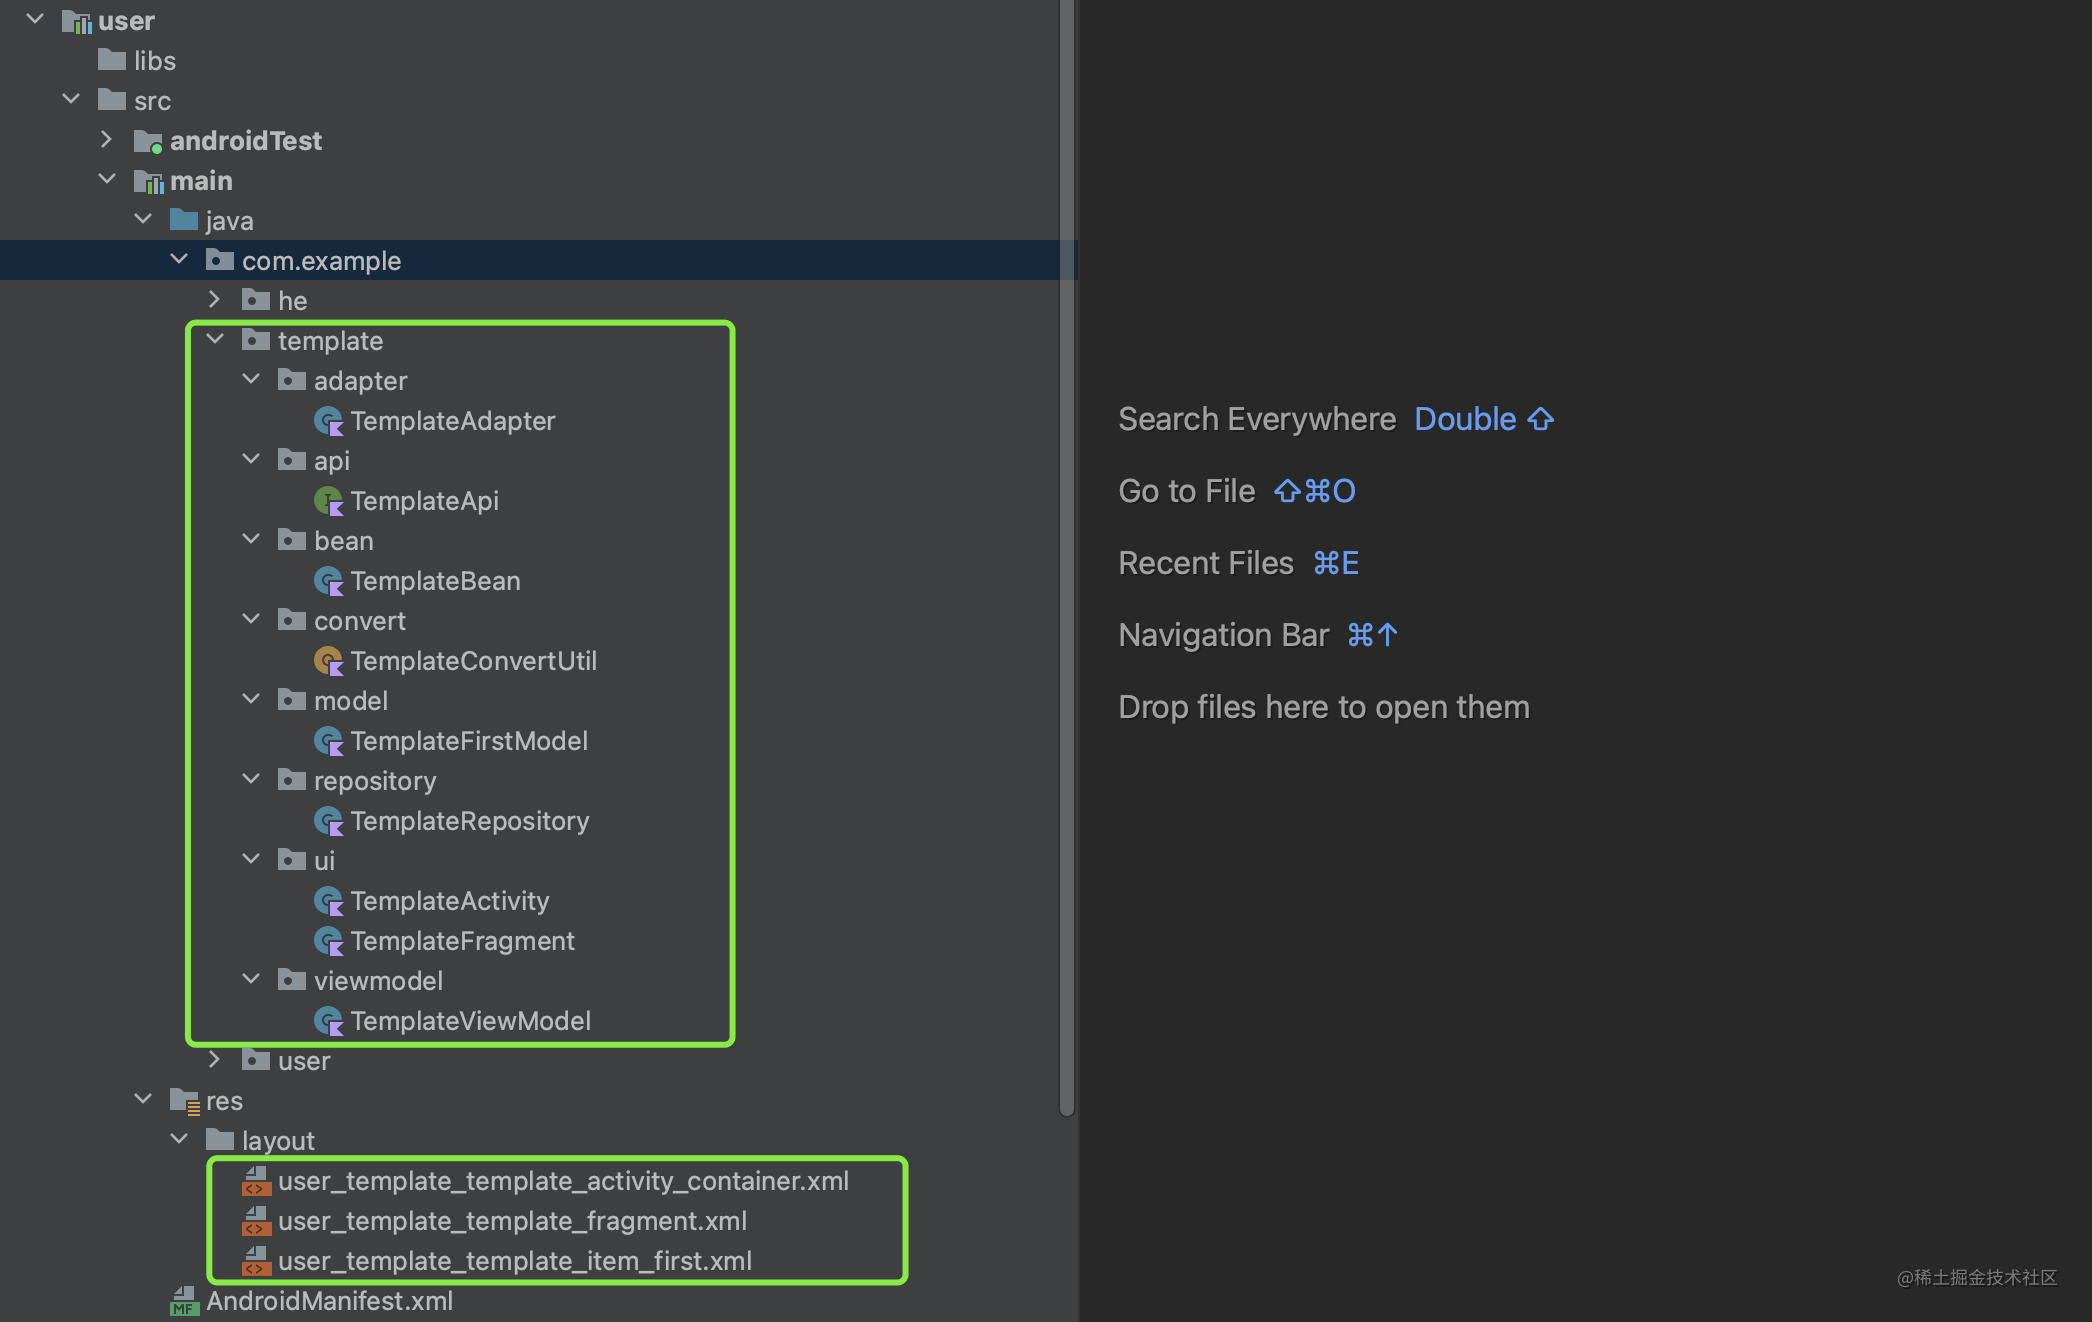
模板配置

生成代码
### 插件工程的创建与配置
#### 工程创建
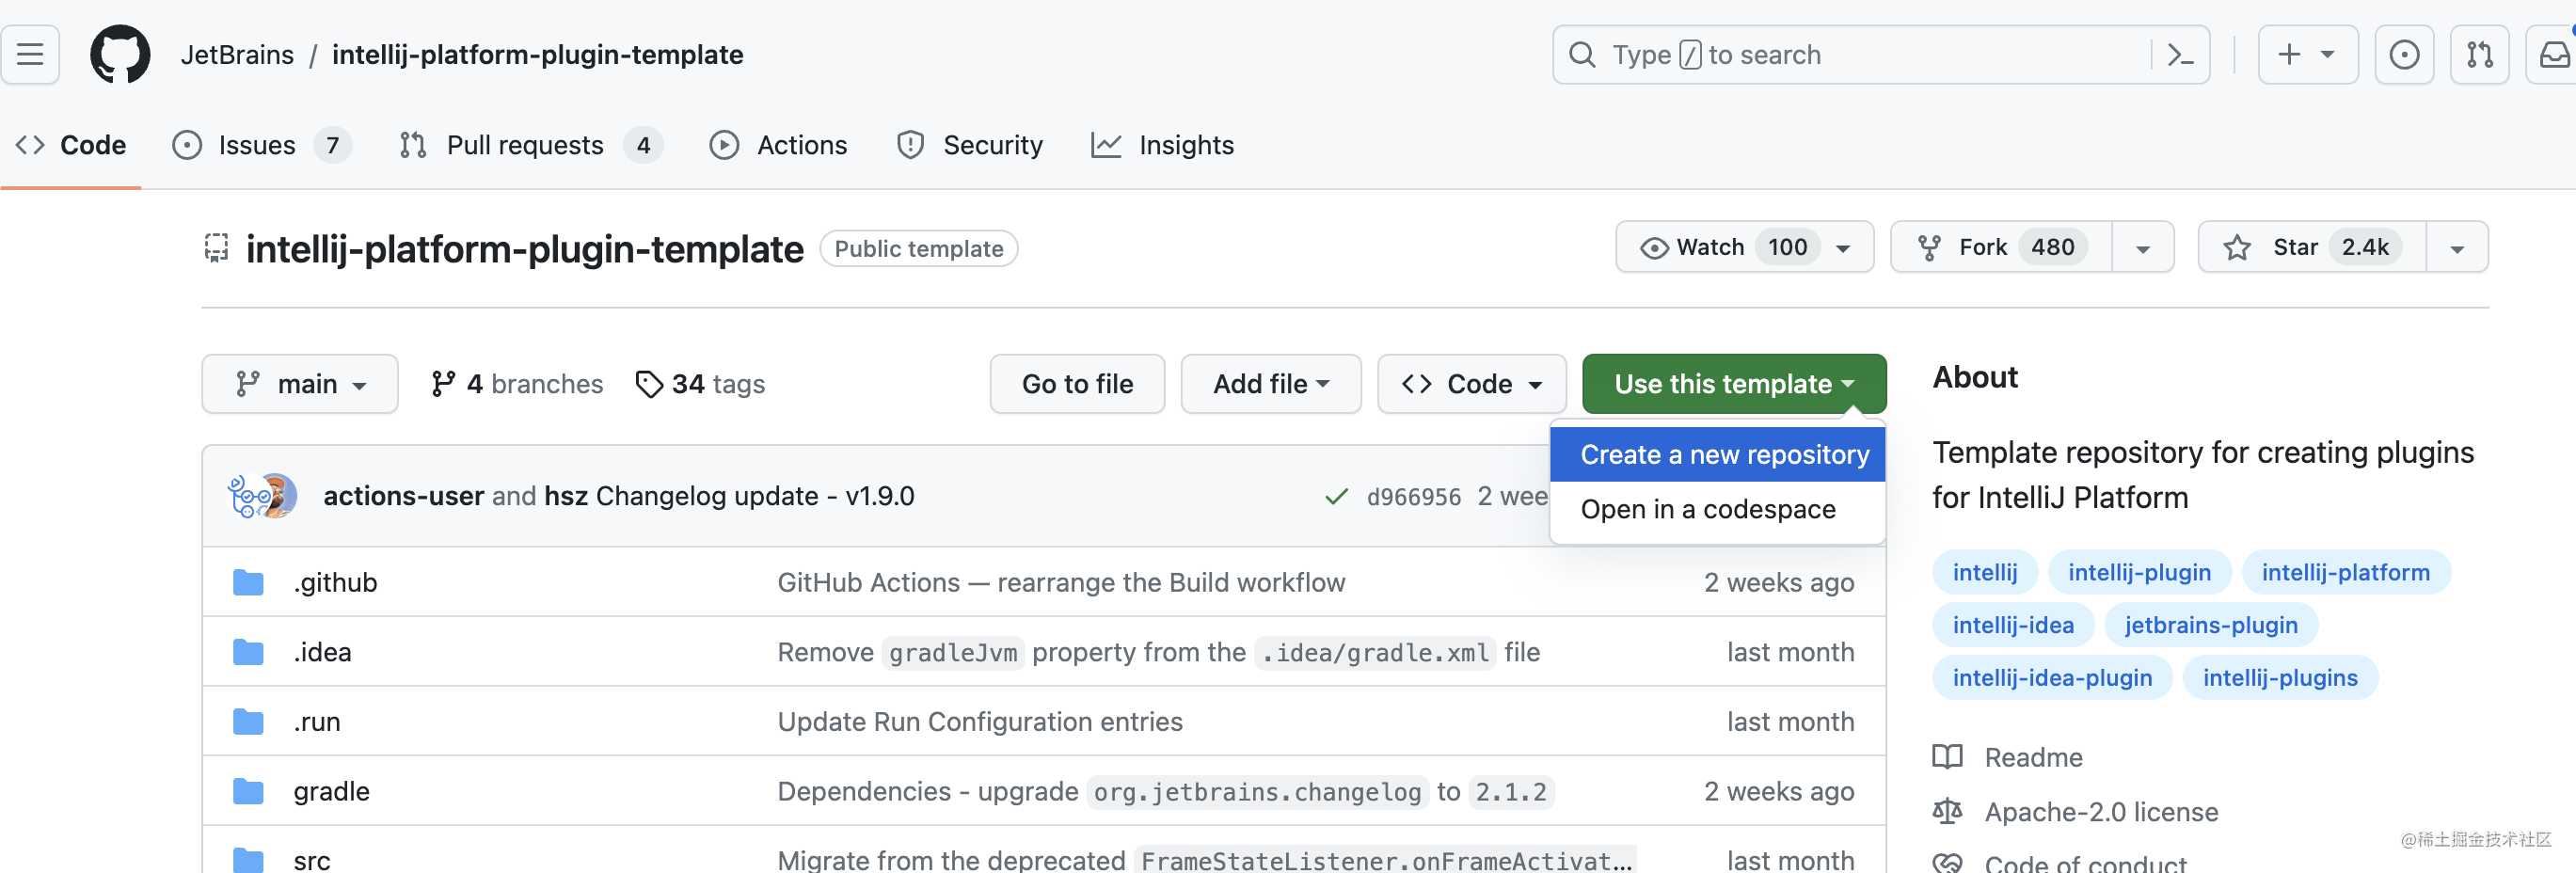
模板项目仓库地址:
[https://github.com/JetBrains/intellij-platform-plugin-template](https://github.com/JetBrains/intellij-platform-plugin-template)
按照步骤 Use this template-> Create a new repository 在自己的github下生成仓库。
这是我生成的项目仓库地址:https://github.com/AlvinScrp/android-code-template
#### 修改配置
用Android Studio打开这个项目,先修改一波基础配置,修改内容的commit:
https://github.com/AlvinScrp/android-code-template/commit/c0eaaa9c7a5451f29efb1b5f91eec131568d5f89
注意:要导入Android代码模板需要的 **wizard-template.jar**, 其实是从**Android Studio目录/plugins/android/lib**中复制过来的。
### 模板插件代码编写
generator包下都是我们新写的代码,代码调用顺序为
**PluginGeneratorProvider.kt** -> **Generator.kt** -> **Recipe.kt**

#### PluginGeneratorProvider
对应【选择模板】界面
```kt
package com.github.alvinscrp.androidcodetemplate.generator
import com.android.tools.idea.wizard.template.Template
import com.android.tools.idea.wizard.template.WizardTemplateProvider
import com.github.alvinscrp.androidcodetemplate.generator.mvvm.jlMvvmGenerator
import com.github.alvinscrp.androidcodetemplate.generator.util.AppType
class PluginGeneratorProvider : WizardTemplateProvider() {
override fun getTemplates(): List = listOf(
//这里建了三套模板
jlMvvmGenerator(AppType.FXJ),
jlMvvmGenerator(AppType.HYK),
jlMvvmGenerator(AppType.MC)
)
}
```
在plugin.xml中注册该provider
```xml
```
#### Generator.kt
```kotlin
package com.github.alvinscrp.androidcodetemplate.generator.mvvm
import com.android.tools.idea.wizard.template.*
import com.android.tools.idea.wizard.template.impl.activities.common.MIN_API
import com.github.alvinscrp.androidcodetemplate.generator.util.AppType
/**
* 模板配置需要的参数,根据你的需要,在这里添加
*/
fun jlMvvmGenerator(appType: AppType): Template {
return template {
name = "DataBinding Mvvm Temp Code - ${appType.key}"
description =
"生成一套基于DataBinding的MVVM代码,包括:Activity、Fragment、ViewModel、ListAdapter、 ListItemModel、BeanModelConvert、Bean、 Retrofit Api、 Repository"
minApi = MIN_API
category = Category.Other
formFactor = FormFactor.Mobile
screens = listOf(
WizardUiContext.ActivityGallery,
WizardUiContext.MenuEntry,
WizardUiContext.NewProject,
WizardUiContext.NewModule)
val bizNameParameter = stringParameter {
name = "Business Name:英文,小写开头,camel命名,可以多单词"
default = "template"
help = "业务名称:英文,可以多单词,camel命名,用来作为生成的各种文件的前缀"
constraints = listOf(Constraint.NONEMPTY)
}
val classPackageNameParameter = stringParameter {
name = "Class Package Name: 这个不要改它"
help = "文件名称:生成文件的存放位置,不是APP包名"
default = "com.github.alvinscrp"
constraints = listOf(Constraint.PACKAGE)
suggest = { packageName }
}
val isCreateActivityParameter = booleanParameter {
name = "生成Activity,需手动加入清单文件"
help = ""
default = false
}
widgets(
TextFieldWidget(bizNameParameter),
TextFieldWidget(classPackageNameParameter),
CheckBoxWidget(isCreateActivityParameter)
)
recipe = {
mvvmRecipe(
it as ModuleTemplateData,
bizNameParameter.value,
classPackageNameParameter.value,
appType,
isCreateActivityParameter.value
)
}
}
}
```
对应【模板配置】界面
#### Recipe.kt
```kotlin
package com.github.alvinscrp.androidcodetemplate.generator.mvvm
import com.android.tools.idea.wizard.template.ModuleTemplateData
import ...
/**
* 模板代码文件的创建与保存
* 这里有几个变量需要注意下:
* ```
* //当前批量生成类文件所在目录 com.example.x.y
* classPackageName : String
*
* //模块名,例如 user
* val moduleName = moduleData.rootDir.name.toLowerCaseAsciiOnly()
*
* //模块包名,例如com.example.user , 在模块AndroidManifest.xml中配置的那个,一定要注意
* val modulePackageName = projectData.applicationPackage
* ```
*/
fun RecipeExecutor.mvvmRecipe(
moduleData: ModuleTemplateData,
bizName: String,
classPackageName: String,
appType: AppType,
isCreateActivity: Boolean
) {
val (projectData, srcOut, resOut) = moduleData
val moduleName = moduleData.rootDir.name.toLowerCaseAsciiOnly()
val modulePackageName = projectData.applicationPackage ?: ""
// println("---->${projectData.rootDir},${projectData.applicationPackage},${moduleData.rootDir.name},${moduleData.packageName}")
if(isCreateActivity) {
save(
mvvmActivityTemp(appType, modulePackageName, classPackageName, moduleName, bizName),
srcOut.resolve("${bizName}/ui/${firstUppercase(bizName)}Activity.kt")
)
//插入Manifest ,这个代码运行报错,反正我也用不到,就不管了
// generateManifest(
// moduleData = moduleData,
// activityClass = "${firstUppercase(bizName)}Activity",
// packageName = "${classPackageName}.${bizName}.ui",
// isLauncher = false,
// hasNoActionBar = false,
// isNewModule = false,
// isLibrary = false,
// generateActivityTitle = false
// )
}
save(
mvvmFragmentTemp(appType, modulePackageName, classPackageName,moduleName, bizName),
srcOut.resolve("${bizName}/ui/${firstUppercase(bizName)}Fragment.kt")
)
......代码较多,省略
save(
fragmentLayoutTemp(appType,classPackageName, bizName),
resOut.resolve("layout/${fragmentLayoutName(moduleName, bizName)}.xml")
)
}
```
#### xxTemp.kt
每个temp function都对应一个目标代码文件。
我们可以先在业务项目里,写一套可运行的Template代码。 插件可以基于这套Template代码修改。
以ActivityTemp.kt举例
```kotlin
package com.github.alvinscrp.androidcodetemplate.generator.mvvm.temp
import com.github.alvinscrp.androidcodetemplate.generator.util.AppType
import com.github.alvinscrp.androidcodetemplate.generator.util.activityLayoutName
import com.github.alvinscrp.androidcodetemplate.generator.util.firstUppercase
import com.github.alvinscrp.androidcodetemplate.generator.util.fragmentClassName
/**
* 生成XxActivity文件的内容,你的项目里是啥,就是啥,不要用我这个模板
*/
fun mvvmActivityTemp(
appType: AppType,
modulePackageName: String,
classPackageName: String,
moduleName: String,
bizName: String
): String {
return """
package ${classPackageName}.${bizName}.ui
import android.os.Bundle
import ${appType.fullBaseActivity()}
import ${modulePackageName}.R
class ${firstUppercase(bizName)}Activity : ${appType.simpleBaseActivity()}() {
override fun onCreate(savedInstanceState: Bundle?) {
super.onCreate(savedInstanceState)
setContentView(R.layout.${activityLayoutName(moduleName, bizName)})
replaceFragment(R.id.fragment_container, ${fragmentClassName(bizName)}.newInstance(123), false)
}
}
""".trimIndent()
}
```
#### TemplUtils.kt
在编写Temp代码时,发现有些地方还是要注意的
* class名:大写开头
* layout.xml文件名:小写字母+下划线
* xxDataBinding,通过layout.xml文件名来转换,更方便.
wizard-template.jar提供了很多的方法给我们,例如:`camelCaseToUnderlines()`,`underscoreToLowerCamelCase()`,`underscoreToCamelCase()`等等
```kotlin
package com.github.alvinscrp.androidcodetemplate.generator.util
import com.android.tools.idea.wizard.template.camelCaseToUnderlines
import com.android.tools.idea.wizard.template.underscoreToCamelCase
import org.jetbrains.kotlin.util.capitalizeDecapitalize.toLowerCaseAsciiOnly
/**
* 形式 ab_cd_ef 必须都是小写,以下划线连接
*/
fun layoutPrefix(moduleName: String, bizName: String): String {
return "${moduleName.toLowerCaseAsciiOnly()}_${camelCaseToUnderlines(bizName).toLowerCaseAsciiOnly()}_template"
}
fun fragmentLayoutName(moduleName: String, bizName: String): String {
return "${layoutPrefix(moduleName,bizName)}_fragment"
}
/**
* moduleName 可能出现的形式 user、 User 、 UserCenter 、User_Center 、 UserCenter_kkk
* 因为要作为布局文件名的前缀,必须都转成小写
*/
fun fragmentDataBindingName(moduleName: String, bizName: String): String {
val layoutPrefix = layoutPrefix(moduleName, bizName)
//sd_te --> SdTe
var camelCaseName = underscoreToCamelCase(layoutPrefix)
return "${camelCaseName}FragmentBinding"
}
fun firstUppercase(param: String): String {
return param.replaceFirstChar { it.uppercase() }
}
```
### 模板插件测试
代码写完,就可以测试插件效果了,AndroidStudio工具栏运行**Run Plugin**
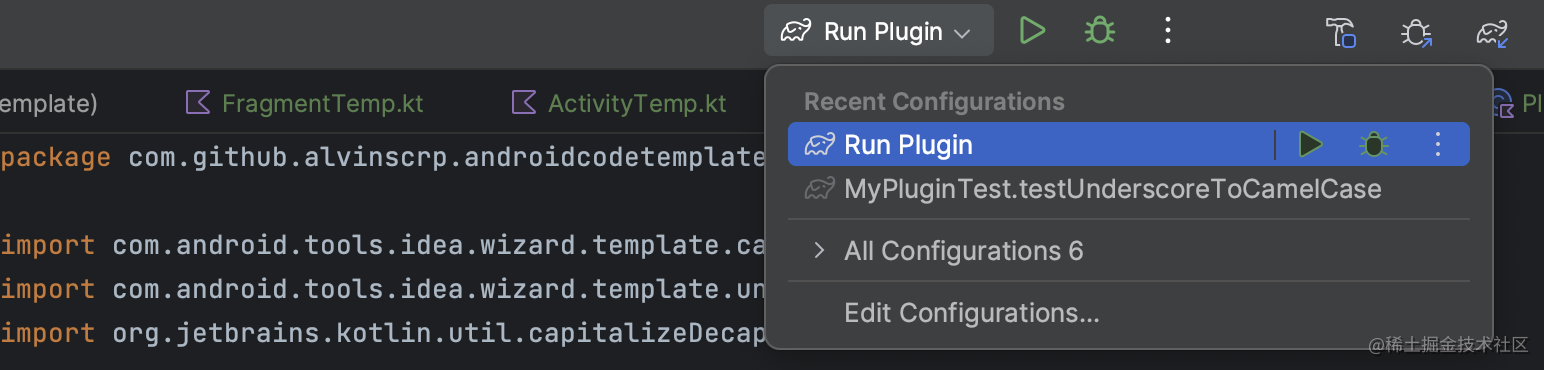
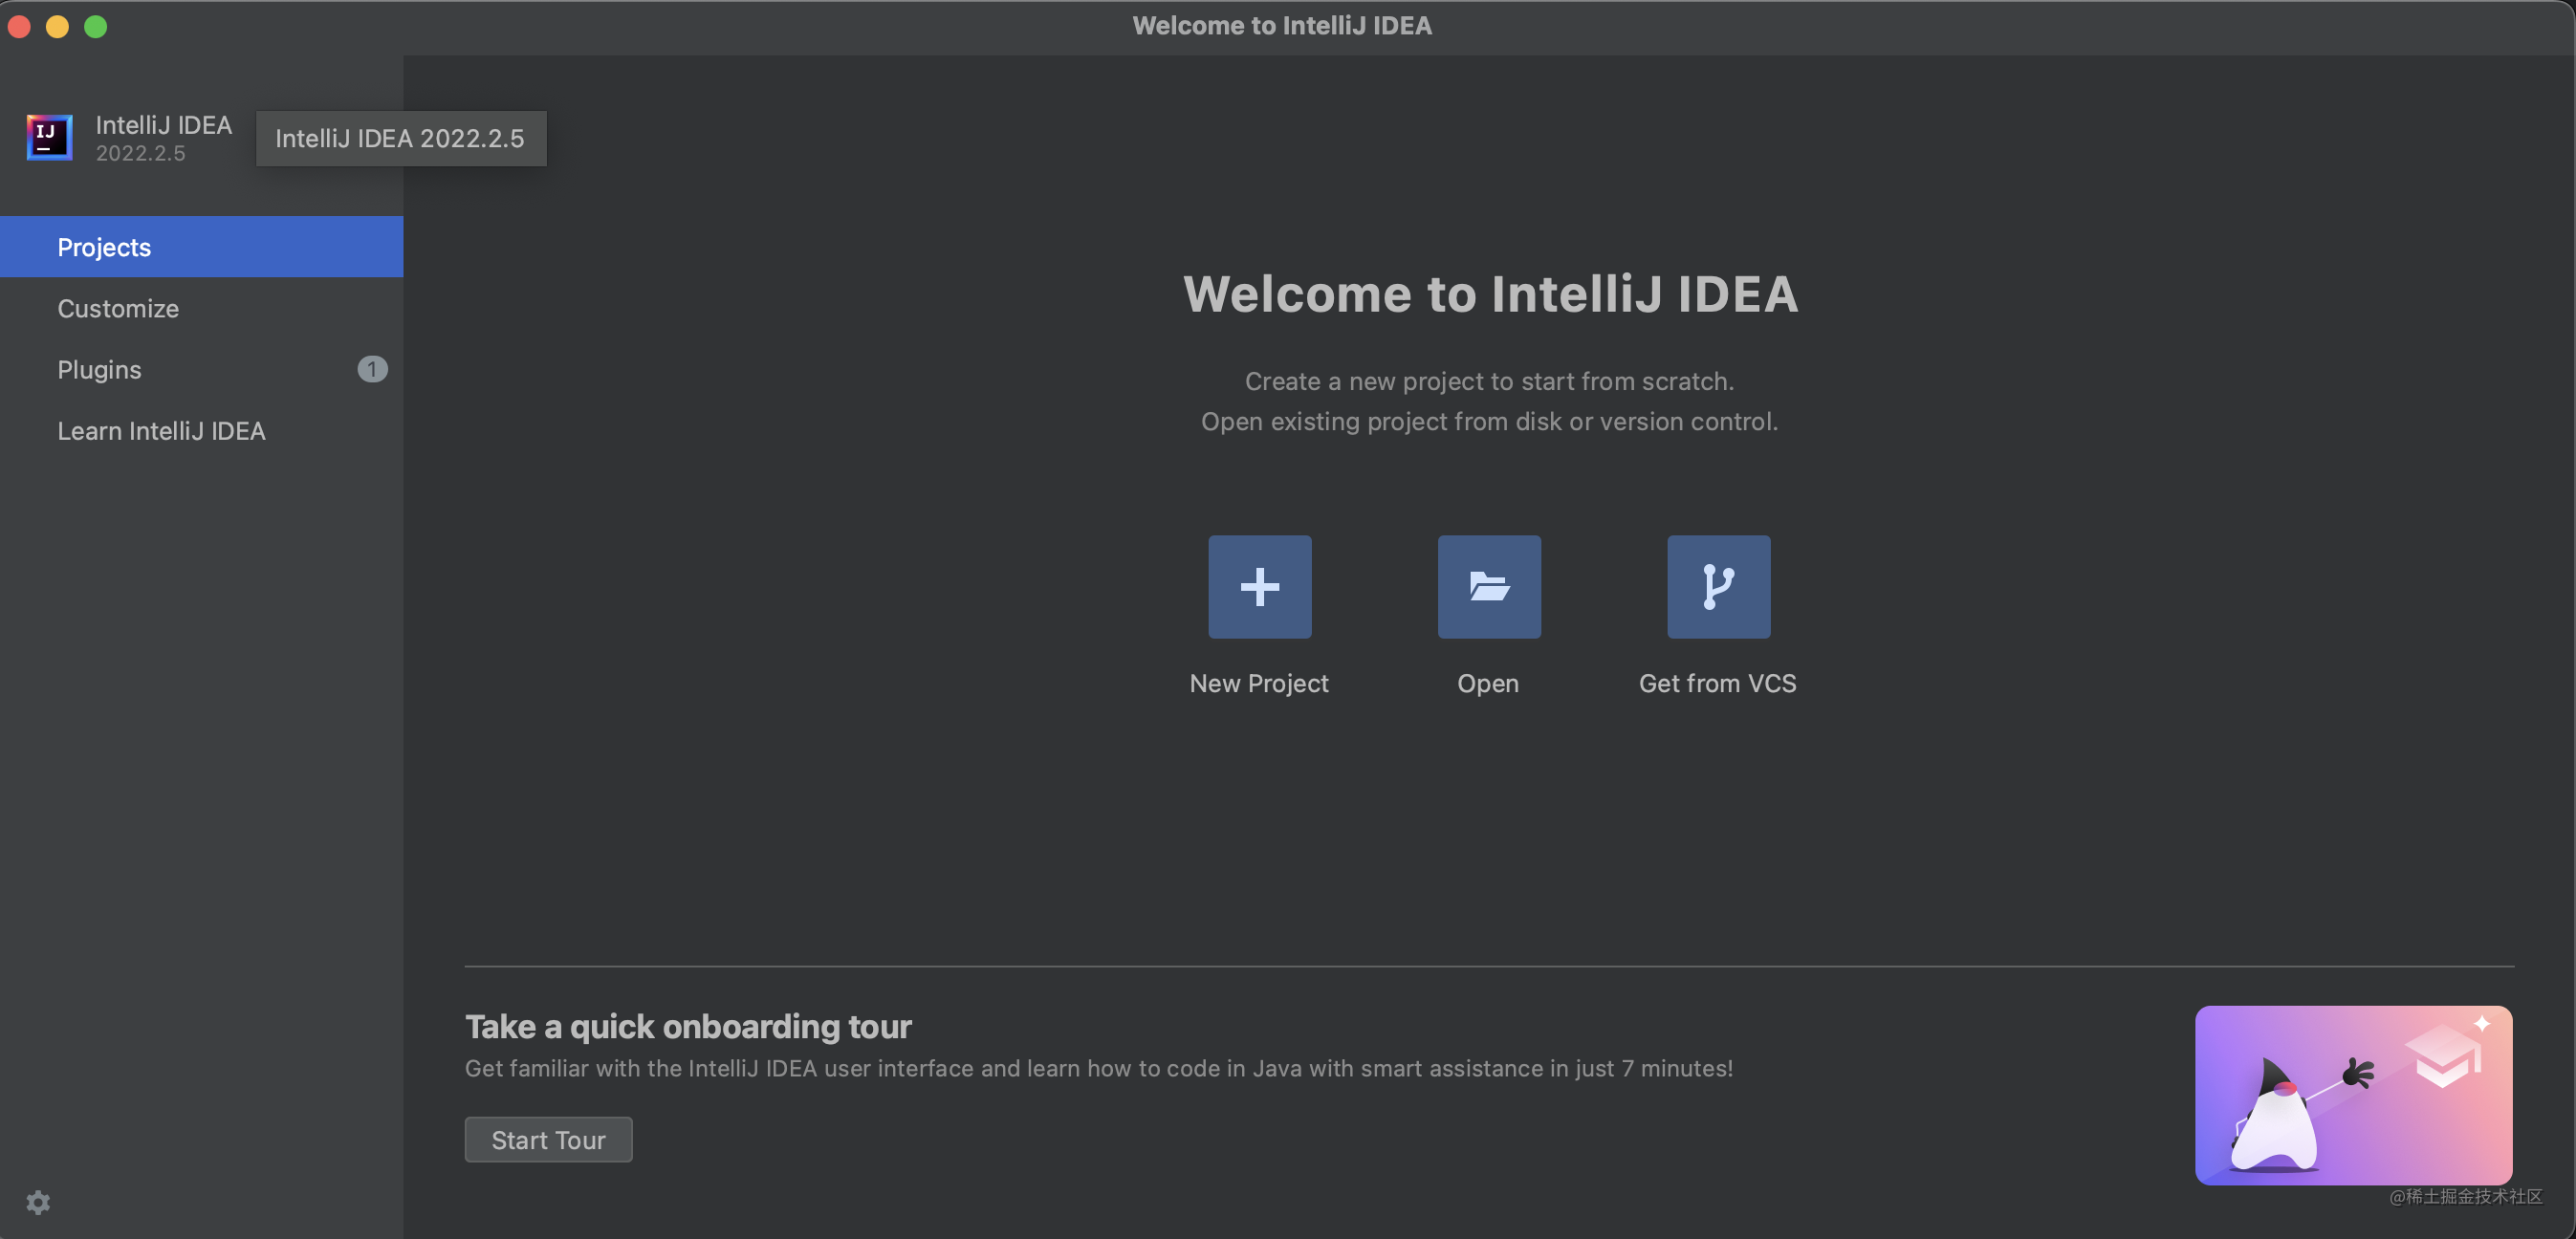
如果可以正常编译,会自动打开一个IntelliJ IDEA窗口。
此时,可以 **New Project** 或者 **Open** 现有APP项目。
最后,按照【选择模板 -> 模板配置 -> 生成代码】的顺序,就可以生成代码了。
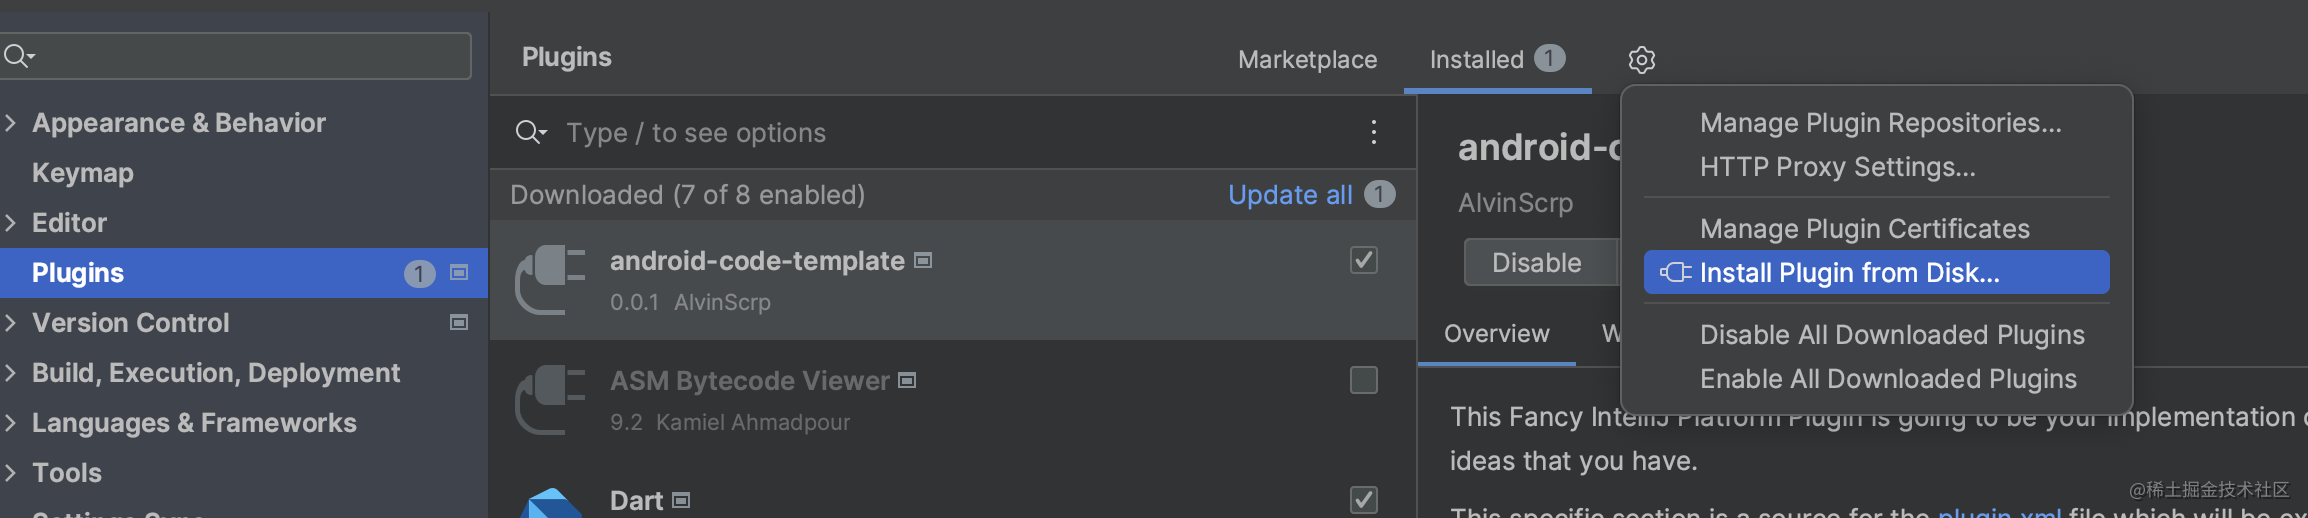
### 模板插件导出与安装
通过上面的测试,你发现,写的插件很好用, "赋能"项目,如下步骤:
* 导出插件jar:位置 build/libs/android-code-template-0.0.1.jar。
* 导入到Android Studio的plugins:Settings -> Plugins -> Install Plugin from Disk...